10.24.2011

Commissioned: banner, bag-o and bench seat

Here are a few commissioned projects I haven't yet blogged about:


These aren't great pictures, but I made a 'Here Comes the Bride' banner for a friend's wedding. Two little boys carried it down the aisle just before Megan and her daddy walked down the aisle. I hope the photographer got a good shot of this banner with the bride in the background! I actually ended up using iron transfer letters for this because that's what I had in hand. If I had thought about it more I would have purchased some iron-on black vinyl and used my Silhouette machine to cut the letters out.
 My boss was having a tailgate and couldn't find his cornhole/bag-o bags, so I made him some. They are really easy! I followed this tutorial. Before I sewed the bags together, I freezer paper stenciled the hogs on. I used my Silhouette to cut out the hogs. I purchased the corn feed from a local farm supply company for super cheap.
 I sewed this bench seat cushion for a friend's sister. That thick foam is expensive! I price shopped for quite  a while and ended up buying it from Hancock Fabrics when they had a 54% off sale. {why 54...why not 50 or 55?}  I used an electric cutting knife to trim it to the size I needed then followed this tutorial for the cover. I would say this is an intermediate-advanced project. If you take it slow you will be fine...there's just a lot of fabric on your machine at one time and some angles to work with. 

10.17.2011

Mizzou's Centennial Homecoming

Sean and I traveled back to Columbia for Mizzou's 100th homecoming this past weekend. We weren't sure what it would feel like to be back in Columbia, but we LOVED it! Running into familiar faces everywhere we went was refreshing. It felt comfortable to be back on campus and surrounded by black and gold.

We went to house decs on Friday night. For those of you who attended Mizzou, they aren't quite as impressive anymore. Rightfully so they have cut back on the amount of pomping - I mean...those were ridiculously time consuming and expensive anyways. I'm glad they've done that, but they're not quite as much fun to see anymore.
The parade, however, was great! This float was my favorite - my super sweet 16 themed.
After the parade we popped into the new bookstore to buy a couple of things then headed to my sorority house for a brunch. Look at my tan-tastic headshot below. Not sure how I even got that dark and am slightly embarrased that picture will be up in the house forever.
A good family friend graciously let us sit with him at the game. The weather was beautiful (we actually got a little sunburned)! 
 This is a picture from inside the new student commons center - it's really impressive! Tons of room for student to hang out, study and grab a meal in between classes. They did a great job integrating Mizzou traditions into the new facility.
 Last but not least we dropped in HyVee. Oh, how we miss this place! I really didn't realize what I was missing  until we went back in - their selection is SO big and prices are good. With the Wal Mart national headquarters in NWA, that's pretty much our only option here. Sean plans to write a letter to HyVee asking them to expand into our area. I'm sure they'll listen. :)
 We also spent time with old friends, went to The Crossing on Sunday morning and dropped in the new Goodwill store {it's the nicest one I've ever been to!}. We have no idea where we will end up after Sean finishes school in May, but Columbia is definitely on the list of places we might like to be! 


10.10.2011

DIY Camping Party Invitations

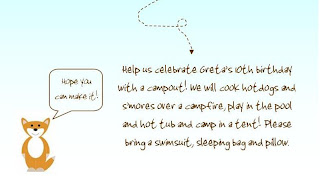
These are some party invitations I made for a 10 year girls birthday party and they turned out pretty stinking cute. Since the theme is camping I had the idea to make each invite a s'mores kit.

With some inspiration from the web, I grabbed the clip art from thinkstock.com, downloaded a font called Pinewood and used Publisher to put it together.

Front:
 Back:
 For the actual invites I used vellum envelopes from Hobby Lobby. I printed off the above design on cardstock, filled the envelopes with s'mores goodies, then stapled the topper to the envelope. I used tape to secure the envelope shut.
 You probably want to assemble these close to when you hand them out so the graham crackers and marshmallows stay yummy.
 These will be fun invitations to hand out at school! With just $10 and less than an hour's time, these cute DIY s'mores invitations add a special touch to party!

10.04.2011

Baby shower - DIY elements

This past weekend I hosted my first baby shower for a friend here in Fayetteville. Here are the invites I made - based off an idea I found on pinterest.
As my gift to the new-mom-to-be I painted this door sign. It acted as door decor for the shower, but can also hang on her hospital door when little Caleb is born. I left room for them to write in his stats after he makes his appearance. I really like how this turned out. It's just a $5 canvas from Hobby Lobby that I painted. I used a sharpie for his name and the Bible verse, but will probably use my Silhouette to cut out vinyl/heat transfer on the next version for additional precision.
 Welcome baby banner.
 I made some tissue paper poms (see tutorial here) and some paper pinwheels (see tutorial here) to hang above the food table. The thing to remember about the paper pinwheels is that the larger the diameter of the circles, the longer the strips of pleated paper will need to be. Hot gluing the circles to the front and back centers provides stability.
This was one of my favorite parts of the shower! I set up a onesie decorating station with freezer paper stencils. Here's a good tutorial on freezer paper stenciling. I googled various boy friendly shapes, imported them into my Silhouette software to trace their outline then used the machine to cut out the freezer paper stencils. I hung them on some fishing line with mini clothespins from Hobby Lobby. Other items I had out:
iron and ironing board
fabric paint
foam brushes
paper plates
blow dryer 
instruction sheet

The guests loved this!  
 I bought a couple packs of onesies and blank bibs for the guests to decorate. Note on the blank bibs: when heat setting the fabric paint, don't hold the iron in one place too long b/c the bibs have a plastic backing that could melt.
 See all of their adorable creations?!
 I also had a stack of diapers out with sharpies for guests to write encouraging notes for the new mommy and daddy.
 Overall it was a success! I think Mandy felt loved and cared for - she's got a great support network of friends and family in the area, which I'm sure she will appreciate as she starts her family!