Showing posts with label craft. Show all posts

10.10.2011

DIY Camping Party Invitations

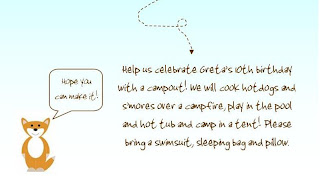
These are some party invitations I made for a 10 year girls birthday party and they turned out pretty stinking cute. Since the theme is camping I had the idea to make each invite a s'mores kit.

With some inspiration from the web, I grabbed the clip art from thinkstock.com, downloaded a font called Pinewood and used Publisher to put it together.

Front:
 Back:
 For the actual invites I used vellum envelopes from Hobby Lobby. I printed off the above design on cardstock, filled the envelopes with s'mores goodies, then stapled the topper to the envelope. I used tape to secure the envelope shut.
 You probably want to assemble these close to when you hand them out so the graham crackers and marshmallows stay yummy.
 These will be fun invitations to hand out at school! With just $10 and less than an hour's time, these cute DIY s'mores invitations add a special touch to party!

10.04.2011

Baby shower - DIY elements

This past weekend I hosted my first baby shower for a friend here in Fayetteville. Here are the invites I made - based off an idea I found on pinterest.
As my gift to the new-mom-to-be I painted this door sign. It acted as door decor for the shower, but can also hang on her hospital door when little Caleb is born. I left room for them to write in his stats after he makes his appearance. I really like how this turned out. It's just a $5 canvas from Hobby Lobby that I painted. I used a sharpie for his name and the Bible verse, but will probably use my Silhouette to cut out vinyl/heat transfer on the next version for additional precision.
 Welcome baby banner.
 I made some tissue paper poms (see tutorial here) and some paper pinwheels (see tutorial here) to hang above the food table. The thing to remember about the paper pinwheels is that the larger the diameter of the circles, the longer the strips of pleated paper will need to be. Hot gluing the circles to the front and back centers provides stability.
This was one of my favorite parts of the shower! I set up a onesie decorating station with freezer paper stencils. Here's a good tutorial on freezer paper stenciling. I googled various boy friendly shapes, imported them into my Silhouette software to trace their outline then used the machine to cut out the freezer paper stencils. I hung them on some fishing line with mini clothespins from Hobby Lobby. Other items I had out:
iron and ironing board
fabric paint
foam brushes
paper plates
blow dryer 
instruction sheet

The guests loved this!  
 I bought a couple packs of onesies and blank bibs for the guests to decorate. Note on the blank bibs: when heat setting the fabric paint, don't hold the iron in one place too long b/c the bibs have a plastic backing that could melt.
 See all of their adorable creations?!
 I also had a stack of diapers out with sharpies for guests to write encouraging notes for the new mommy and daddy.
 Overall it was a success! I think Mandy felt loved and cared for - she's got a great support network of friends and family in the area, which I'm sure she will appreciate as she starts her family! 


9.20.2011

A few Silhouette SD projects

I can't tell you how much I love my Silhouette machine. It's so versatile! You just download the Silhouette software from their website and connect the machine to your comp with a USB cord. It can be used to cut heat transfer material, paper, fabric, vinyl, etc. The software is really easy to use and has an interface pretty similar to Word. Here are a few of the projects I have done so far:

I did another upgrade to our front door wreath {it has gone through many changes over the past couple of years}. For this I used Silhouette's flocked white heat transfer material and it worked like a charm. I purchased the heat transfer starter pack from their website and it came with a few different colors. One of the coolest things about the Silhouette software is that you can import any image or font you want to use!
It's kind of hard to see in this picture, but I  imported the Razorback image, traced it and cut it out on fabric. I just iron fabric to one side of fusible interfacing then place that on the thick cut mat with the paper backing still attached. I put the settings on a slow cut speed and it works great! One time there were little pieces that didn't cut all the way through, but I just used an exacto knife to help with that. Then, just peel the paper backing off of your new shape, iron on to fabric and stitch around edge for added durability.

Silhouette does sell their own fusible interfacing for fabric, but for this I just used good old Wonder Under and it worked great.
 This is the same razorback shape and I also cut the monogram out of fabric. I will post this crib bumper project next.
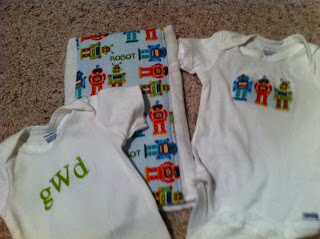
  Another great use for the Silhouette is to cut freezer paper to use for a stencil! It's so accurate and can cut shapes that would take for-ev-er with just a craft knife in just mere seconds. The monogram onesie below is an example of this. I did also make a couple of other precious onesies for a friend's new baby girl, but forgot to take pictures.
The Silhouette is coming out with a new model next month that can cut patterns up to 12" wide {as opposed to the current 8.5"}. I haven't found a need for the wider cutting capabilities myself, but others seem to be really excited about it.

7.28.2011

yo-yo necklace

Sean's cousin Kaitlyn saw this necklace in a boutique shop and sent me the pic.

Using this tutorial, I made a bunch of yo-yos from my scrap fabrics and gave her this necklace when she finished college!
The straps are strips of knit fabric {they roll when you stretch them out} and each yo yo is secured to their neighbor yo yo with a few stitches.
Kait really likes dinosaurs and I had a random dinosaur button - match made in heaven!
This project is really easy and a great way to use up scraps, but there is a lot of tying of knots because I used needle and thread for the whole thing. Try it!

7.12.2011

Birthday girl onesie

A friend from Columbia has a little girl, Jillian, who is turning one next month -- she asked me to help create her birthday outfit and I was happy to oblige.

I appliqued the cupcake liner and candle, then ruffled the tulle for the 'icing.' Sewed all with my machine.
I also added colorful pleats around the leg. Sewed a fabric tube 4"x20", ironed flat, pinned the pleats then sewed it.

Here's the adorable hair clip that coordinates! It has an alligator clip on the back that can just clip either into her hair or onto a headband. 45" of fabric and two rows of tulle, pleated and sewed onto a round piece of felt.
The tute is made of all bright colors -- it's super cute, but that glitter got everywhere! She only turns one once, though, so I think glitter is in order.

Can't wait to see some pics of little miss in her outfit!


I'm linking this project to:
Making the World Cuter, The DIY Show Off, Skip to My Lou, Today's Creative Blog, Fireflies and Jellybeans, Beyond the Picket Fence, Tatertots and Jello, Kojo Designs

5.17.2011

Easy desk spruce up.

Fact: I spend more time at my desk than I do with my husband. Man, that's a bummer to actually type!


Fact: my desk is boring


Solution: Add some color to my desk. I used fusible interfacing to iron on some fabric to my existing mouse pad.

I used mod-podge to cover my existing coaster.
It's now a little cheerier (is that a word?) at my desk. Another thing that helps is this cool desk calendar that Sean bought me for Christmas.


5.16.2011

Congrats, Kait!

This weekend, Sean's cousin Kaitlyn graduated from the UofA. We had a little celebratory brunch for her at our placebefore the ceremony. I made this yummy cake -- I tried to follow the 'rules' of freezing, leveling off, crumb coat etc. I looks pretty good, but could have used another coat of icing.

I found these really cute printable letter banners here. Would be great for showers!


Way to go, Kait! This girl worked hard for her degree and deserved a day to celebrate her accomplishment. See her necklace? That was my graduation gift to her, and the project sneak peek I blogged about last week. I'll post more on that later.


5.10.2011

Project sneak peak

Started working on a graduation gift today -- here's a quick teaser.

4.17.2011

What we're up to

Spring football is over! PTL! I'm so excited to have my husband back! He has been working so hard we've probably had dinner together 5 times in the past month.


We are going to Branson for Easter and I'm so excited to see family and friends. I'm hosting a wedding shower for my BFF from high school on Saturday -- here's a sneak peek at some of the decorations I made! The colors are gray and yellow. :) The brides parents own a precious cafe in Branson and are going to do the food (chilled pineapple soup is on the menu!). I'm not sure if I was kind enough to my bridesmaids. If you're reading this, girls, please accept my dearest apologies for not loving on you enough during the whole process! It's so fun for me to help celebrate their weddings now.


This week is going to be a short one, which is good b/c I need a bit of a break from our normal routine. I'll be in office on Monday, clinic on Tuesday, Springfield for meetings on Wed and Thur then Branson over the weekend. Can't wait! p.s. Spellcheck is flagging 'Branson' -- who doesn't know what Branson is?! ;)

4.06.2011

My crafting to-do list

Jute covered letters - so presh!


Another ruffle apron for a wedding shower game prize.


A Razorback romper. I purchased a plain black one online and will probably freezer paper stencil the letters on. This romper with a fun necklace and some comfy red wedges I have would be a fun game day outfit!
How cute is this little girls romper?! Did you know american eagle has a kids line? Looks simple enough to recreate and would be a cute baby gift!

I have a couple of orders for game day dresses that I need to finish in the next week.

I would love to try one of these for my BFF's wedding shower in a couple of weeks. I think it helps make for a really sweet picture of the dress on the wedding day. If you don't want to DIY, you can get them for a reasonable price on Etsy, like this one:

Isn't this necklace adorable? It's from anthro, but a tutorial to make your own can be found here.

Whew! It makes me tired to look at all of these, but I'm excited to cross some of them off my to-do list soon!

3.06.2011

Pins you can see

When I'm sewing, I always manage to lose one or two pins. They are really hard to find in our carpet! Since I have a puppy at my feet at almost all times, the dropping of pins issue has escalated. Enter Sculpey - clay you bake in the oven. {I got these on sale at JoAnn for .97 each) I just formed it into little shapes, formed it around the end of a straight pin, then baked them at 275 for 20 minutes.
These shouldn't be hard to find in the carpet...or my dogs mouth. win/win.

Photobucket


2.22.2011

So cute!

How cute is this play kitchen!? A super talented lady over at Dwellings by Devore makes some of the most wonderful things! This table is so awesome! It started as just a regular wood table that she painted, added the glass sections to, and accented with nailhead trim.
So inspired by all of her work!
Photobucket

2.15.2011

Pottery Barn necklace

You're probably thinking -- 'I didn't know Pottery Barn made jewelry!'

Well...they don't. But they do have great adornments on their gift wrapped boxes! This adorable key was on a gift at a bridal shower I recently attended. I made her rehearsal bouquet and this little lovely made it into my box of bows and ribbons. I found a perfectly matching chain on clearance for 0.97 at JoAnns and now have a cute, new necklace!


My mom is going to have a hay day with this one! She is always amazed/proud/embarrassed about how cheap I am. It's not too difficult to go from the proud to the embarrassed category.

Photobucket